Automate ComboFan S mechanical ventilation with Home Assistant
Published on • Last updated on
A healthy climate is of great importance in every home. In addition to regularly opening windows and/or doors to ventilate, most homes nowadays are equiped with mechanical ventilation.
My (rental) home is equipped with a Zehnder Combofan S ventilation unit. Ventilation can be set to position 1 (low), 2 (medium) and 3 (high) by means of a turning knob in the kitchen. The bathroom is equiped with a timer which sets the ventilation to high for a set period.
Since I started using Home Assistant, automating the mechanical ventilation was at the top of my wish list. Not because it can be done, but to actually improve my living comfort.
What do I want to achieve
- Eliminate the need to manually change the ventilation speed
- Activate ventilation when humidity in the bathroom is above a set threshold (e.g. when shower is in use)
- Activate ventilation when air quality in the livingroom is deteriorating
Connect Comfofan S to Home Assistant
All you need to control the Combofan S is a dimmer that provides 0 to 10 volt output (0 volt = off, 10 volt = high). I wanted to connect the Combofan S to Home Assistant via Zigbee, so the search started for a device that is compatible with Zigbee2MQTT and Home Assistant, which doesn't cost too much, and most important, I can undo any changes without permanent damage to the mechanical ventilation.
After some searching I came across a cheap device (Zigbee 0-10V Dimmer) on AliExpress that should fit my needs. The same device is also available on Amazon, it is however quite a lot more expensive. As product listings change I would recommend searching for "zigbee 0-10v dimmer" on AliExpress or Amazon and compare it to the device you see in the pictures in this blog.
After just a couple of days the device arrived, but before I hooked it up I performed a couple of checks;
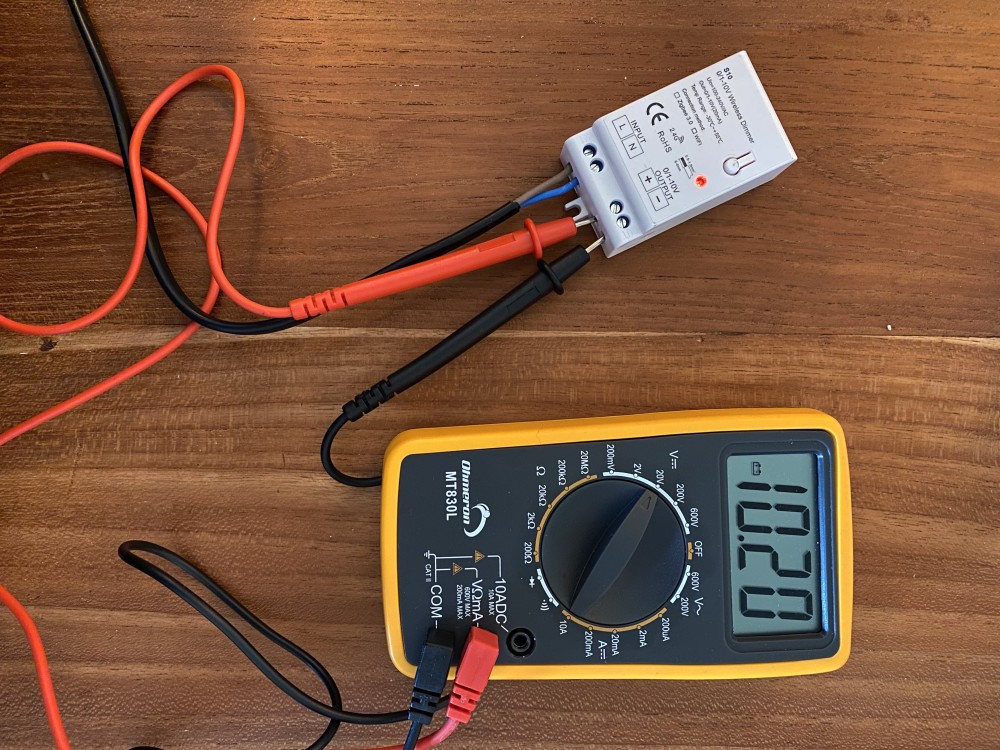
- Multimeter showed that the output voltage is stable and between 0 and 10 volts
- Pairing with Zigbee2MQTT and Home Assistant was successful, device is detected as YSRSAI YSR-MINI-01_dimmer

Installing Zigbee dimmer
Before you continue, don't forget you are working with electricity and are altering the Comfoban S, so continue at your own risk. Also make sure to disconnect the power of both the Combofan S and the Zigbee device!
Now the Combofan S has to be opened for the Zigbee dimmer to be installed (tip: turn the red cap until gap is aligned with the point where the red and grey part of the body align, next pull it off with quite some force).
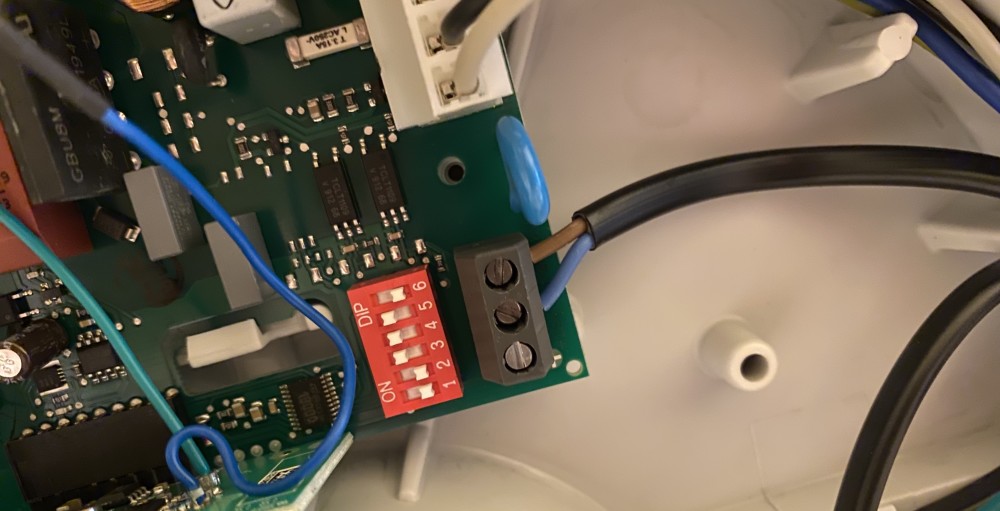
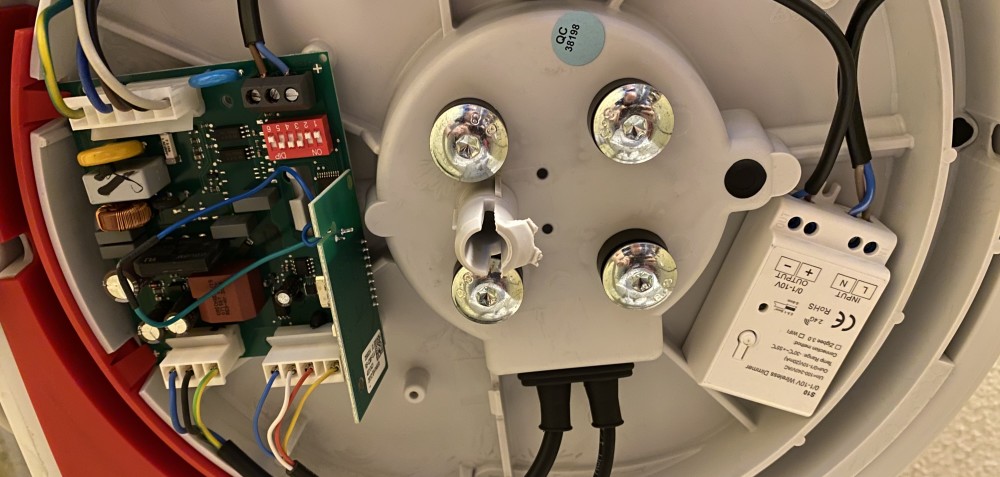
You should see the red dipswitch connector with a black connector directly besides it (with 3 connections). Follow the Combofan S manual to correctly connect the devices (see picture below). I also had to change switch 5 to "on" for the Zigbee device to work.

After you connect both devices you can turn them both back on. Now use Zigbee2MQTT to alter the output voltage and see if the Combofan changes the fan speed. Because this is a LED dimmer, Zigbee2MQTT shows the output voltage as "brightness" between 0 and 254.
Tip: The Zigbee module is only able to set the speed of the fan higher than it is already set by a physical button in the house (e.g. when the button in the kitchen is set to "high" you cannot set the speed to "low" with the Zigbee module)
If everything works as expected you can hide the Zigbee component inside the fan with some double sided tape before you close everything up.

Configuring Home Assistant
Home Assistant detects the Zigbee module as a light dimmer. With the following configuration a "fan" entity is created named "Central Ventilation" which offers 3 speed settings (you can change this, but the "low", "medium" and "high" setting is sufficient for me).
template:
  - fan:
      - name: "Central Ventilation"
        unique_id: "centralventilation"
        state: "{{ states('light.storage_ventilation') }}"
        percentage: >
          {% if states('light.storage_ventilation') == 'on' %}
            {{ (state_attr('light.storage_ventilation','brightness') | default(0) / 255 * 100) | default(0) }}
          {% else %}
            0
          {% endif %}
        speed_count: 3
        set_percentage:
          action: light.turn_on
          entity_id: light.storage_ventilation
          data_template:
            brightness_pct: "{{percentage}}"
        turn_on:
          action: homeassistant.turn_on
          entity_id: light.storage_ventilation
        turn_off:
          action: homeassistant.turn_off
          entity_id: light.storage_ventilation
You can now use the "tile" card in Home Assistant to control the mechanical ventilation, resulting in the following.

Automate the ventilation
Now that the Combofan S can be controlled by Home Assistant we want to automate it's behaviour.
Bathroom humidity
I purchased the Aqara Humidity sensor to monitor the humidity in my bathroom. This sensor costs around 18 euro's on Amazon and works perfectly fine with Zigbee2MQTT and Home Assistant.
I created a simple automation that triggers when the humidity reaches 60%. Next the fan speed is set to high and a timer for 1 hour is started. When the hour is over the fan is set to low. This normally is enough time to get the humidity down to acceptable levels, and it prevents the fan needlessly running at high speed.
Livingroom air quality
For the livingroom I purchases the IKEA VINDSTYRKA sensor (39,99 euro). This device was recently introduced and can be paired with Zigbee2MQTT and Home Assistant without any problems. The device monitors temperature, humidity, PM2.5 (fine inhalable particles with diameter of 2.5 micrometers and smaller) and TVOC (total volatile organic compounds) which can be used to determine the air quality.
For TVOC the sensor provides a VOC index with a value between 0 and 500. The value 100 means the air quality has not changed, a value below 100 means the air quality has improved, and a value above 100 means the air quality has deteriorated (in comparison to earlier measurements).
This VOC index is perfect for triggering the mechanical ventilation (or for example air purification, which I do not currently have). When the value reaches 150 an automation is triggered and the ventilation is set to high (and a timer is set for one hour, just like in the bathroom).